轻量级 Kubernetes 发行版实践

部署和管理原生 Kubernetes 集群是一项颇具挑战的工作,社区因此推出了轻量级 Kubernetes 发行版以降低运维复杂度。
Minikube 结合 Podman 实践
Minikube 是轻量级的 Kubernetes 实现,可在本地计算机上创建虚拟机并部署仅包含节点的简单集群。
Podman 是开源的容器运行时工具,它提供与 Docker 相似的功能,但不需要守护进程,并且支持更多的安全特性和 rootless 模式运行。
基础环境
OS: macOS
Architecture: ARM64
Driver: Podman

CPUs: 2
Memory: 2Gi
Disk: 20GiB

Installer: Homebrew
安装使用 Podman
➜ brew install podman
==> Installing dependencies for podman: capstone, dtc, pcre2, gettext, glib, gmp, libtasn1, nettle, p11-kit, openssl@3, libnghttp2, unbound, gnutls, jpeg-turbo, libpng, libslirp, libssh, libusb, lzo, pixman, snappy, vde and qemu
==> podman
➜ podman machine init --cpus 2 --memory 2048 --disk-size 20 --rootful
Downloading VM image: fedora-coreos-39.20231204.2.1-qemu.aarch64.qcow2.xz: done
Extracting compressed file: podman-machine-default_fedora-coreos-39.20231204.2.1-qemu.aarch64.qcow2: done
Image resized.
Machine init complete➜ podman machine start
Starting machine "podman-machine-default"
Waiting for VM ...
Mounting volume... /Users:/Users
Mounting volume... /private:/private
Mounting volume... /var/folders:/var/folders
API forwarding listening on: /Users/damonguo/.local/share/containers/podman/machine/qemu/podman.sock
The system helper service is not installed; the default Docker API socket address can't be used by podman.
If you would like to install it, run the following commands:
sudo /opt/homebrew/Cellar/podman/4.8.1/bin/podman-mac-helper install
podman machine stop; podman machine start
You can still connect Docker API clients by setting DOCKER_HOST using the following command in your terminal session:
export DOCKER_HOST='unix:///Users/damonguo/.local/share/containers/podman/machine/qemu/podman.sock'
Machine "podman-machine-default" started successfully➜ podman machine list
NAME VM TYPE CREATED LAST UP CPUS MEMORY DISK SIZE
podman-machine-default qemu 8 minutes ago Currently running 2 2GiB 20GiB安装使用 Minikube
➜ brew install minikube
==> Installing dependencies for minikube: kubernetes-cli
==> minikube
➜ minikube config set driver podman
These changes will take effect upon a minikube delete and then a minikube start➜ minikube start --driver=podman --kubernetes-version=v1.28.3
minikube v1.32.0 on Darwin 14.1.2 (arm64)
Using the podman (experimental) driver based on user configuration
Using Podman driver with root privileges
Starting control plane node minikube in cluster minikube
Pulling base image ...
Downloading Kubernetes v1.28.3 preload ...
preloaded-images-k8s-v18-v1...: 341.16 MiB / 341.16 MiB 100.00% 13.99 M
gcr.io/k8s-minikube/kicbase...: 410.58 MiB / 410.58 MiB 100.00% 13.22 M
Creating podman container (CPUs=2, Memory=1887MB) ...
Preparing Kubernetes v1.28.3 on Docker 24.0.7 ...
Generating certificates and keys ...
Booting up control plane ...
Configuring RBAC rules ...
Configuring bridge CNI (Container Networking Interface) ...
Verifying Kubernetes components...
Using image gcr.io/k8s-minikube/storage-provisioner:v5
Enabled addons: storage-provisioner, default-storageclass
Done! kubectl is now configured to use "minikube" cluster and "default" namespace by default➜ minikube status
minikube
type: Control Plane
host: Running
kubelet: Running
apiserver: Running
kubeconfig: Configured➜ kubectl get namespaces
NAME STATUS AGE
default Active 4m40s
kube-node-lease Active 4m40s
kube-public Active 4m40s
kube-system Active 4m40s
➜ kubectl get nodes
NAME STATUS ROLES AGE VERSION
minikube Ready control-plane 4m44s v1.28.3
➜ kubectl get svc
NAME TYPE CLUSTER-IP EXTERNAL-IP PORT(S) AGE
kubernetes ClusterIP 10.96.0.1 <none> 443/TCP 16m部署测试 Nginx Service
➜ vim nginx-deploy-svc.yaml
---
apiVersion: apps/v1
kind: Deployment
metadata:
  name: nginx-deploy
spec:
  replicas: 2
  selector:
    matchLabels:
      app: nginx
  template:
    metadata:
      labels:
        app: nginx
    spec:
      containers:
        - name: nginx
          image: nginx
          ports:
            - containerPort: 80
---
apiVersion: v1
kind: Service
metadata:
  name: nginx-svc
spec:
  selector:
    app: nginx
  type: NodePort
  ports:
    - name: http
      port: 80
➜ kubectl apply -f nginx-deploy-svc.yaml
deployment.apps/nginx-deploy created
service/nginx-svc created➜ kubectl get all
NAME READY STATUS RESTARTS AGE
pod/nginx-deploy-7c5ddbdf54-4d8c2 1/1 Running 0 67s
pod/nginx-deploy-7c5ddbdf54-cmcg2 1/1 Running 0 67s
NAME TYPE CLUSTER-IP EXTERNAL-IP PORT(S) AGE
service/kubernetes ClusterIP 10.96.0.1 <none> 443/TCP 24m
service/nginx-svc NodePort 10.103.72.229 <none> 80:31985/TCP 67s
NAME READY UP-TO-DATE AVAILABLE AGE
deployment.apps/nginx-deploy 2/2 2 2 67s
NAME DESIRED CURRENT READY AGE
replicaset.apps/nginx-deploy-7c5ddbdf54 2 2 2 67s➜ minikube service nginx-svc --url
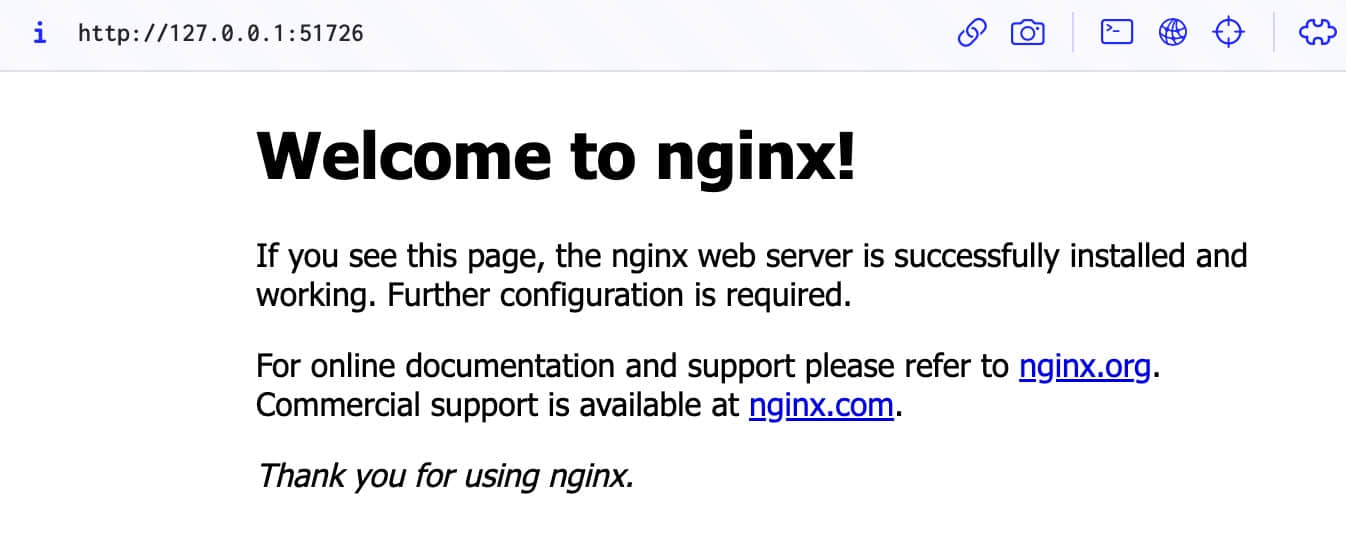
http://127.0.0.1:51726
Because you are using a Docker driver on darwin, the terminal needs to be open to run it.通过 Tunnel 访问 Nginx: http://127.0.0.1:51726
清理 Minikube 和 Podman
➜ minikube stop
Stopping node "minikube"  ...
Powering off "minikube" via SSH ...
1 node stopped.
➜ minikube status
minikube
type: Control Plane
host: Stopped
kubelet: Stopped
apiserver: Stopped
kubeconfig: Stopped➜ minikube delete
Deleting "minikube" in podman ...
Deleting container "minikube" ...
Removing /Users/damonguo/.minikube/machines/minikube ...
Removed all traces of the "minikube" cluster.➜ podman machine list
NAME VM TYPE CREATED LAST UP CPUS MEMORY DISK SIZE
podman-machine-default qemu 54 minutes ago Currently running 2 2GiB 20GiB➜ podman machine stop podman-machine-default
Waiting for VM to exit...
Machine "podman-machine-default" stopped successfully➜ podman machine rm podman-machine-default
The following files will be deleted:
/Users/damonguo/.ssh/podman-machine-default
/Users/damonguo/.ssh/podman-machine-default.pub
/Users/damonguo/.config/containers/podman/machine/qemu/podman-machine-default.ign
/Users/damonguo/.local/share/containers/podman/machine/qemu/podman-machine-default_fedora-coreos-39.20231204.2.1-qemu.aarch64.qcow2
/Users/damonguo/.local/share/containers/podman/machine/qemu/podman.sock
/Users/damonguo/.local/share/containers/podman/machine/qemu/podman-machine-default_ovmf_vars.fd
/Users/damonguo/.config/containers/podman/machine/qemu/podman-machine-default.json
Are you sure you want to continue? [y/N] y➜ minikube delete --purge --all
Successfully deleted all profiles
Successfully purged minikube directory located at - [/Users/damonguo/.minikube]
➜ brew uninstall minikube
➜ brew uninstall podmanKinD 实践
KinD (Kubernetes in Docker) 是轻量级的工具,用于在 Docker 中运行本地 Kubernetes 集群。
基础环境
OS: macOS
Architecture: ARM64
Driver: Docker

Installer: Homebrew
安装使用 KinD
➜ brew install kind
==> Installing kind
==> Pouring kind--0.20.0.arm64_sonoma.bottle.tar.gz
==> kind
➜ kind version
kind v0.20.0 go1.21.1 darwin/arm64创建名为 mycluster 的 K8S 集群,并将 hostPort 的30080端口暴露到 localhost 的30080端口。
➜ vim config-with-port-mapping.yaml
kind: Cluster
apiVersion: kind.x-k8s.io/v1alpha4
nodes:
- role: control-plane
  extraPortMappings:
  - containerPort: 30080
    hostPort: 30080
➜ kind create cluster --name mycluster --config=config-with-port-mapping.yaml
Creating cluster "mycluster" ...
✓ Ensuring node image (kindest/node:v1.27.3)
✓ Preparing nodes
✓ Writing configuration
✓ Starting control-plane
✓ Installing CNI
✓ Installing StorageClass
Set kubectl context to "kind-mycluster"
You can now use your cluster with:
kubectl cluster-info --context kind-mycluster
Thanks for using kind!➜ kubectl cluster-info --context kind-mycluster
Kubernetes control plane is running at https://127.0.0.1:64070
CoreDNS is running at https://127.0.0.1:64070/api/v1/namespaces/kube-system/services/kube-dns:dns/proxy➜ kind get clusters
mycluster➜ kubectl get nodes
NAME STATUS ROLES AGE VERSION
mycluster-control-plane Ready control-plane 85s v1.27.3
➜ kubectl get pods -n kube-system
NAME READY STATUS RESTARTS AGE
coredns-5d78c9869d-6zdpz 1/1 Running 0 81s
coredns-5d78c9869d-twr96 1/1 Running 0 81s
etcd-mycluster-control-plane 1/1 Running 0 94s
kindnet-x9zrb 1/1 Running 0 81s
kube-apiserver-mycluster-control-plane 1/1 Running 0 96s
kube-controller-manager-mycluster-control-plane 1/1 Running 0 94s
kube-proxy-5zzch 1/1 Running 0 81s
kube-scheduler-mycluster-control-plane 1/1 Running 0 94s
➜ kubectl get namespaces
NAME STATUS AGE
default Active 108s
kube-node-lease Active 108s
kube-public Active 108s
kube-system Active 108s
local-path-storage Active 104s部署测试 Nginx Service
➜ kubectl get all
NAME                 TYPE        CLUSTER-IP   EXTERNAL-IP   PORT(S)   AGE
service/kubernetes   ClusterIP   10.96.0.1    <none>        443/TCP   119s
➜ vim nginx-deploy-svc-portmapping.yaml
---
apiVersion: apps/v1
kind: Deployment
metadata:
name: nginx-deploy
spec:
replicas: 2
selector:
matchLabels:
app: nginx
template:
metadata:
labels:
app: nginx
spec:
containers:
- name: nginx
image: nginx
ports:
- containerPort: 80
---
apiVersion: v1
kind: Service
metadata:
name: nginx-svc
spec:
selector:
app: nginx
type: NodePort
ports:
- name: http
port: 80
nodePort: 30080➜ kubectl apply -f nginx-deploy-svc-portmapping.yaml
deployment.apps/nginx-deploy created
service/nginx-svc created➜ kubectl get all
NAME READY STATUS RESTARTS AGE
pod/nginx-deploy-55f598f8d-f2c2q 1/1 Running 0 35s
pod/nginx-deploy-55f598f8d-ljxd8 1/1 Running 0 35s
NAME TYPE CLUSTER-IP EXTERNAL-IP PORT(S) AGE
service/kubernetes ClusterIP 10.96.0.1 <none> 443/TCP 5m5s
service/nginx-svc NodePort 10.96.221.64 <none> 80:30080/TCP 35s
NAME READY UP-TO-DATE AVAILABLE AGE
deployment.apps/nginx-deploy 2/2 2 2 35s
NAME DESIRED CURRENT READY AGE
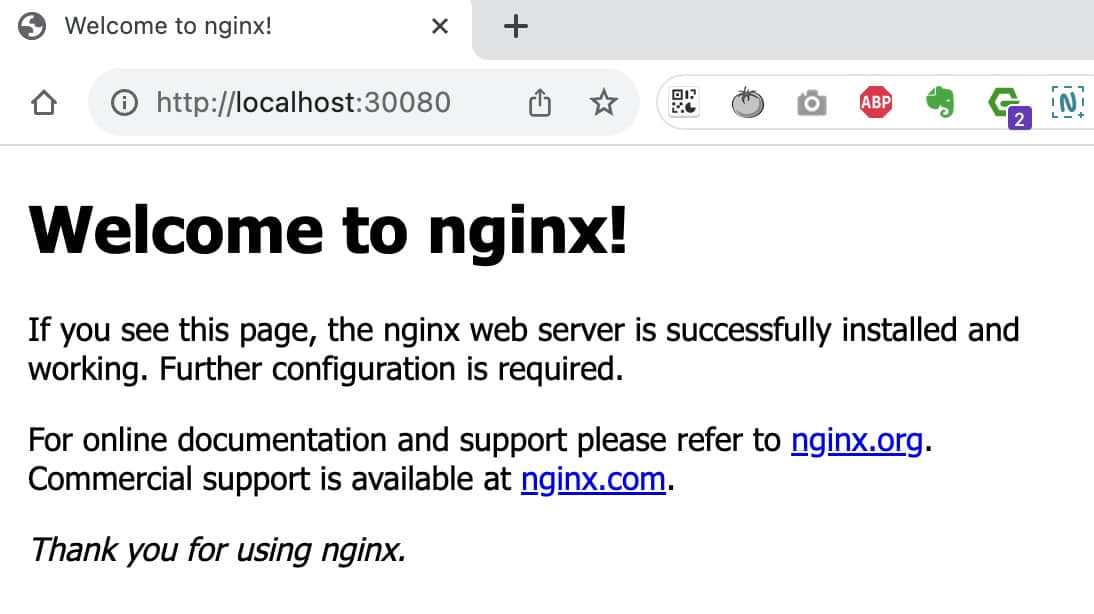
replicaset.apps/nginx-deploy-55f598f8d 2 2 2 35s通过 NodePort 本地端口映射访问 Nginx: http://localhost:30080
清理 KinD
➜ kind delete cluster --name mycluster
Deleting cluster "mycluster" ...
Deleted nodes: ["mycluster-control-plane"]

➜ kind get clusters
No kind clusters found.

➜ kubectl config delete-context kind-mycluster
deleted context kind-mycluster from /Users/damonguo/.kube/config

➜ brew uninstall kind
K3S 结合 Multipass 实践
K3S 是轻量级、易于安装的 Kubernetes 发行版。
Multipass 是 Ubuntu 公司 Canonical 开发的用于快速创建、管理和操作 Ubuntu 虚拟机的工具。
基础环境
OS: macOS
Architecture: ARM64
Virtualization: Multipass

CPUs: 1
Memory: 1Gi
Disk: 10GiB

Installer: Homebrew
安装使用 Multipass
➜ brew install --cask multipass
==> Downloading https://github.com/canonical/multipass/releases/download/v1.12.2/multipass-1.12.2+mac-Darwin.pkg
==> Installing Cask multipass
installer: Package name is multipass
installer: Installing at base path /
installer: The install was successful.
multipass was successfully installed!
➜ multipass launch --name k3s-server --cpus 1 --memory 1G --disk 10G
Launched: k3s-server➜ multipass info k3s-server
Name: k3s-server
State: Running
IPv4: 192.168.64.2
Release: Ubuntu 22.04.3 LTS
Image hash: 9256911742f0 (Ubuntu 22.04 LTS)
CPU(s): 1
Load: 0.56 0.15 0.05
Disk usage: 1.4GiB out of 9.6GiB
Memory usage: 140.0MiB out of 962.3MiB
Mounts: --安装使用 K3S
➜ multipass shell k3s-server
Welcome to Ubuntu 22.04.3 LTS (GNU/Linux 5.15.0-89-generic aarch64)
ubuntu@k3s-server:~$ curl -sfL https://get.k3s.io | sh -
[INFO]  Finding release for channel stable
[INFO]  Using v1.27.7+k3s2 as release
[INFO]  Downloading hash https://github.com/k3s-io/k3s/releases/download/v1.27.7+k3s2/sha256sum-arm64.txt
[INFO]  Downloading binary https://github.com/k3s-io/k3s/releases/download/v1.27.7+k3s2/k3s-arm64
[INFO]  Verifying binary download
[INFO]  Installing k3s to /usr/local/bin/k3s
[INFO]  Skipping installation of SELinux RPM
[INFO]  Creating /usr/local/bin/kubectl symlink to k3s
[INFO]  Creating /usr/local/bin/crictl symlink to k3s
[INFO]  Creating /usr/local/bin/ctr symlink to k3s
[INFO]  Creating killall script /usr/local/bin/k3s-killall.sh
[INFO]  Creating uninstall script /usr/local/bin/k3s-uninstall.sh
[INFO]  env: Creating environment file /etc/systemd/system/k3s.service.env
[INFO]  systemd: Creating service file /etc/systemd/system/k3s.service
[INFO]  systemd: Enabling k3s unit
Created symlink /etc/systemd/system/multi-user.target.wants/k3s.service → /etc/systemd/system/k3s.service.
[INFO]  systemd: Starting k3s

ubuntu@k3s-server:~$ sudo k3s kubectl get nodes
NAME          STATUS   ROLES                  AGE   VERSION
k3s-server    Ready    control-plane,master   19s   v1.27.7+k3s2

ubuntu@k3s-server:~$ sudo ss -lntpu | grep k3s-server
tcp   LISTEN 0      4096                          127.0.0.1:10248      0.0.0.0:*    users:(("k3s-server",pid=2786,fd=172))
tcp   LISTEN 0      4096                          127.0.0.1:10249      0.0.0.0:*    users:(("k3s-server",pid=2786,fd=208))
tcp   LISTEN 0      4096                          127.0.0.1:6444       0.0.0.0:*    users:(("k3s-server",pid=2786,fd=15))
tcp   LISTEN 0      4096                          127.0.0.1:10256      0.0.0.0:*    users:(("k3s-server",pid=2786,fd=206))
tcp   LISTEN 0      4096                          127.0.0.1:10257      0.0.0.0:*    users:(("k3s-server",pid=2786,fd=86))
tcp   LISTEN 0      4096                          127.0.0.1:10258      0.0.0.0:*    users:(("k3s-server",pid=2786,fd=202))
tcp   LISTEN 0      4096                          127.0.0.1:10259      0.0.0.0:*    users:(("k3s-server",pid=2786,fd=209))
tcp   LISTEN 0      4096                                  *:10250            *:*    users:(("k3s-server",pid=2786,fd=168))
tcp   LISTEN 0      4096                                  *:6443             *:*    users:(("k3s-server",pid=2786,fd=13))

ubuntu@k3s-server:~$ sudo cat /var/lib/rancher/k3s/server/node-token
K10fa8d62310e361852c7607ba12b9667cd05f52122df80ca928448200295bb0969::server:c421b343a4f042a2a3511156664a76b1

ubuntu@k3s-server:~$ exit
logout
➜ multipass launch --name k3s-agent --cpus 1 --memory 1G --disk 10G
Launched: k3s-agent➜ multipass list
Name State IPv4 Image
k3s-server Running 192.168.64.2 Ubuntu 22.04 LTS
10.42.0.0
10.42.0.1
k3s-agent Running 192.168.64.3 Ubuntu 22.04 LTS➜ multipass shell k3s-agent
Welcome to Ubuntu 22.04.3 LTS (GNU/Linux 5.15.0-89-generic aarch64)
ubuntu@k3s-agent:~$ curl -sfL https://get.k3s.io | K3S_URL=https://192.168.64.2:6443 K3S_TOKEN="K10fa8d62310e361852c7607ba12b9667cd05f52122df80ca928448200295bb0969::server:c421b343a4f042a2a3511156664a76b1" sh -
[INFO] Finding release for channel stable
[INFO] Using v1.27.7+k3s2 as release
[INFO] Downloading hash https://github.com/k3s-io/k3s/releases/download/v1.27.7+k3s2/sha256sum-arm64.txt
[INFO] Downloading binary https://github.com/k3s-io/k3s/releases/download/v1.27.7+k3s2/k3s-arm64
[INFO] Verifying binary download
[INFO] Installing k3s to /usr/local/bin/k3s
[INFO] Skipping installation of SELinux RPM
[INFO] Creating /usr/local/bin/kubectl symlink to k3s
[INFO] Creating /usr/local/bin/crictl symlink to k3s
[INFO] Creating /usr/local/bin/ctr symlink to k3s
[INFO] Creating killall script /usr/local/bin/k3s-killall.sh
[INFO] Creating uninstall script /usr/local/bin/k3s-agent-uninstall.sh
[INFO] env: Creating environment file /etc/systemd/system/k3s-agent.service.env
[INFO] systemd: Creating service file /etc/systemd/system/k3s-agent.service
[INFO] systemd: Enabling k3s-agent unit
Created symlink /etc/systemd/system/multi-user.target.wants/k3s-agent.service → /etc/systemd/system/k3s-agent.service.
[INFO] systemd: Starting k3s-agent
ubuntu@k3s-agent:~$ exit
logout部署测试 Nginx Service
➜ multipass shell k3s-server
Welcome to Ubuntu 22.04.3 LTS (GNU/Linux 5.15.0-89-generic aarch64)
ubuntu@k3s-server:~$ sudo k3s kubectl get nodes
NAME         STATUS   ROLES                  AGE     VERSION
k3s-server   Ready    control-plane,master   9m26s   v1.27.7+k3s2
k3s-agent    Ready    <none>                 71s     v1.27.7+k3s2
ubuntu@k3s-server:~$ vim nginx-deploy-svc.yaml
---
apiVersion: apps/v1
kind: Deployment
metadata:
name: nginx-deploy
spec:
replicas: 2
selector:
matchLabels:
app: nginx
template:
metadata:
labels:
app: nginx
spec:
containers:
- name: nginx
image: nginx
ports:
- containerPort: 80
---
apiVersion: v1
kind: Service
metadata:
name: nginx-svc
spec:
selector:
app: nginx
type: NodePort
ports:
- name: http
port: 80ubuntu@k3s-server:~$ sudo k3s kubectl apply -f nginx-deploy-svc.yaml
deployment.apps/nginx-deploy created
service/nginx-svc createdubuntu@k3s-server:~$ sudo k3s kubectl get all
NAME READY STATUS RESTARTS AGE
pod/nginx-deploy-55f598f8d-pzr6n 1/1 Running 0 20m
pod/nginx-deploy-55f598f8d-z55ng 1/1 Running 0 20m
NAME TYPE CLUSTER-IP EXTERNAL-IP PORT(S) AGE
service/kubernetes ClusterIP 10.43.0.1 <none> 443/TCP 68m
service/nginx-svc NodePort 10.43.202.7 <none> 80:32711/TCP 20m
NAME READY UP-TO-DATE AVAILABLE AGE
deployment.apps/nginx-deploy 2/2 2 2 20m
NAME DESIRED CURRENT READY AGE
replicaset.apps/nginx-deploy-55f598f8d 2 2 2 20m
ubuntu@k3s-server:~$ exit
logout ➜ multipass list
Name State IPv4 Image
k3s-server Running 192.168.64.2 Ubuntu 22.04 LTS
10.42.0.0
10.42.0.1
k3s-agent Running 192.168.64.3 Ubuntu 22.04 LTS
10.42.1.0
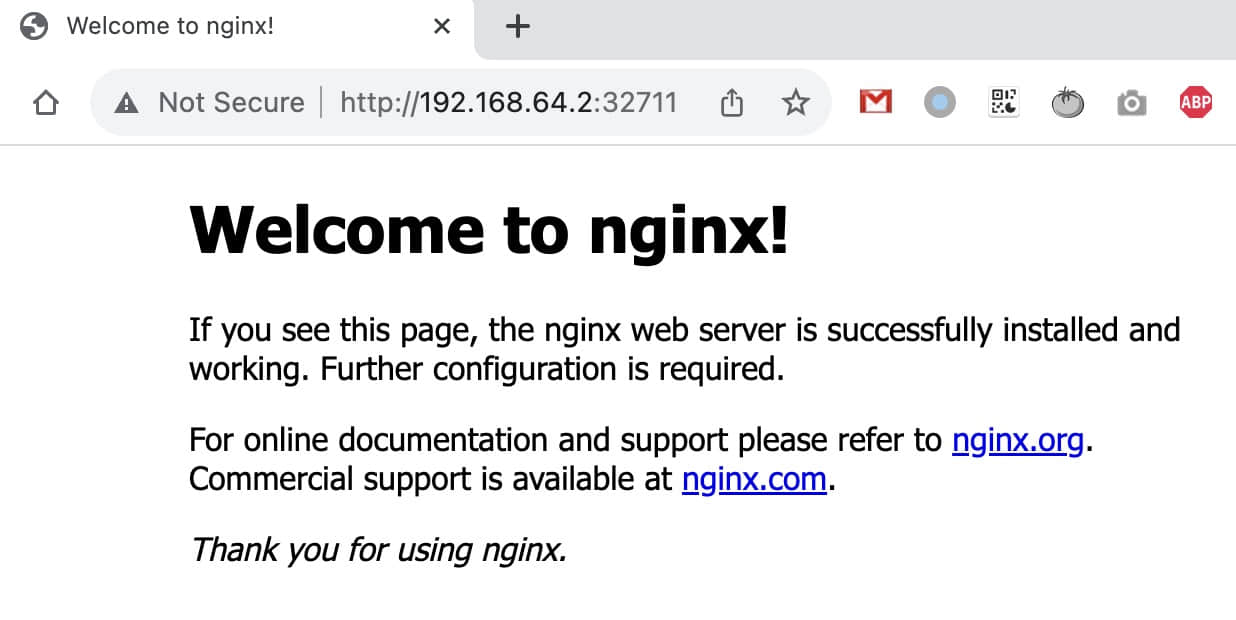
10.42.1.1通过 NodePort 访问 Nginx: http://192.168.64.2:32711
清理 Multipass 和 K3S
➜ multipass delete k3s-server k3s-agent

➜ multipass list
Name                    State             IPv4             Image
k3s-server              Deleted           --               Not Available
k3s-agent               Deleted           --               Not Available

➜ multipass purge

➜ multipass list
No instances found.

➜ brew uninstall --cask multipass
K3D 实践
K3D 是轻量级的工具,用于在 Docker 中运行 K3S。
基础环境
OS: macOS
Architecture: ARM64
Driver: Docker

Installer: Homebrew
安装使用 K3D
➜ brew install k3d
==> Installing k3d
==> Pouring k3d--5.6.0.arm64_sonoma.bottle.tar.gz
==> k3d
➜ k3d version
k3d version v5.6.0
k3s version v1.27.5-k3s1 (default)创建名为 mycluster 的 K8S 集群,并将 Ingress 的80端口暴露到 localhost 的8081端口。
➜ k3d cluster create mycluster -p "8081:80@loadbalancer" --agents 1
INFO[0000] portmapping '8081:80' targets the loadbalancer: defaulting to [servers:*:proxy agents:*:proxy]
INFO[0000] Prep: Network
INFO[0000] Created network 'k3d-mycluster'
INFO[0000] Created image volume k3d-mycluster-images
INFO[0000] Starting new tools node...
INFO[0000] Starting Node 'k3d-mycluster-tools'
INFO[0001] Creating node 'k3d-mycluster-server-0'
INFO[0001] Creating node 'k3d-mycluster-agent-0'
INFO[0001] Creating LoadBalancer 'k3d-mycluster-serverlb'
INFO[0001] Using the k3d-tools node to gather environment information
INFO[0001] HostIP: using network gateway 192.168.167.1 address
INFO[0001] Starting cluster 'mycluster'
INFO[0001] Starting servers...
INFO[0001] Starting Node 'k3d-mycluster-server-0'
INFO[0004] Starting agents...
INFO[0004] Starting Node 'k3d-mycluster-agent-0'
INFO[0007] Starting helpers...
INFO[0007] Starting Node 'k3d-mycluster-serverlb'
INFO[0013] Injecting records for hostAliases (incl. host.k3d.internal) and for 3 network members into CoreDNS configmap...
INFO[0015] Cluster 'mycluster' created successfully!
INFO[0015] You can now use it like this:
kubectl cluster-info
➜ kubectl cluster-info
Kubernetes control plane is running at https://0.0.0.0:56685
CoreDNS is running at https://0.0.0.0:56685/api/v1/namespaces/kube-system/services/kube-dns:dns/proxy
Metrics-server is running at https://0.0.0.0:56685/api/v1/namespaces/kube-system/services/https:metrics-server:https/proxy部署测试 Nginx Service
➜ kubectl get all
NAME                 TYPE        CLUSTER-IP   EXTERNAL-IP   PORT(S)   AGE
service/kubernetes   ClusterIP   10.43.0.1    <none>        443/TCP   48s
➜ vim nginx-deploy-svc-ingress.yaml
---
apiVersion: apps/v1
kind: Deployment
metadata:
name: nginx-deploy
spec:
replicas: 2
selector:
matchLabels:
app: nginx
template:
metadata:
labels:
app: nginx
spec:
containers:
- name: nginx
image: nginx
ports:
- containerPort: 80
---
apiVersion: v1
kind: Service
metadata:
name: nginx-svc
spec:
selector:
app: nginx
type: NodePort
ports:
- name: http
port: 80
---
apiVersion: networking.k8s.io/v1
kind: Ingress
metadata:
name: nginx-ingress
annotations:
ingress.kubernetes.io/ssl-redirect: "false"
spec:
rules:
- http:
paths:
- path: /
pathType: Prefix
backend:
service:
name: nginx-svc
port:
number: 80➜ kubectl apply -f nginx-deploy-svc-ingress.yaml
deployment.apps/nginx-deploy created
service/nginx-svc created
ingress.networking.k8s.io/nginx-ingress created➜ kubectl get all
NAME READY STATUS RESTARTS AGE
pod/nginx-deploy-55f598f8d-z9n5v 1/1 Running 0 2m
pod/nginx-deploy-55f598f8d-h5zkb 1/1 Running 0 2m
NAME TYPE CLUSTER-IP EXTERNAL-IP PORT(S) AGE
service/kubernetes ClusterIP 10.43.0.1 <none> 443/TCP 3m12s
service/nginx-svc NodePort 10.43.58.173 <none> 80:32459/TCP 2m
NAME READY UP-TO-DATE AVAILABLE AGE
deployment.apps/nginx-deploy 2/2 2 2 2m
NAME DESIRED CURRENT READY AGE
replicaset.apps/nginx-deploy-55f598f8d 2 2 2 2m➜ kubectl get ingress
NAME CLASS HOSTS ADDRESS PORTS AGE
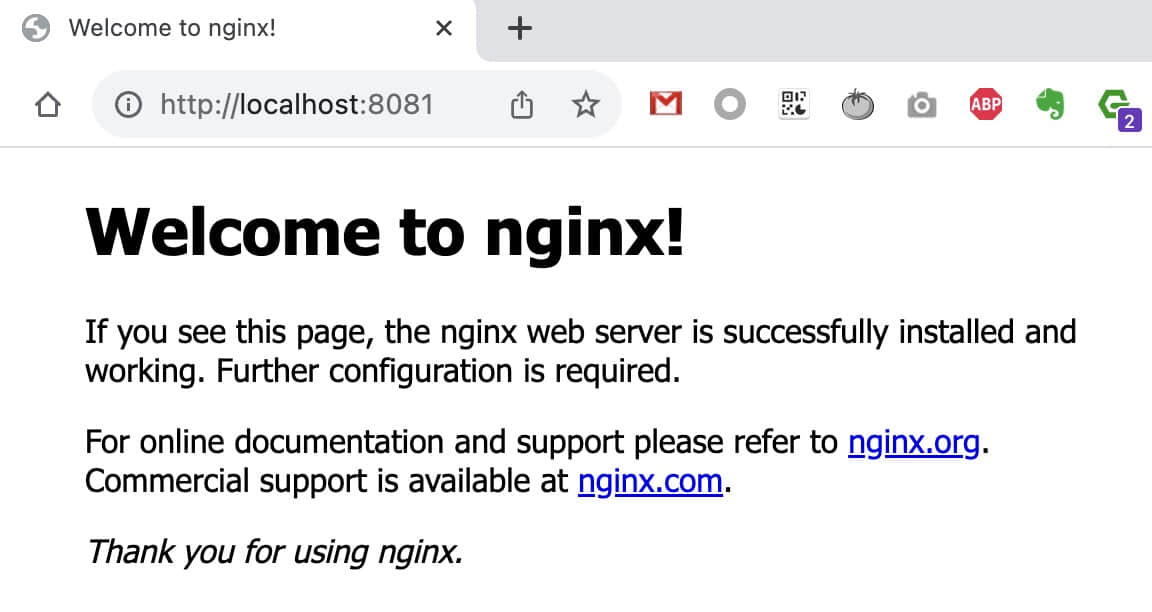
nginx-ingress <none> * 192.168.167.2,192.168.167.3 80 2m56s通过 Ingress 访问 Nginx: http://localhost:8081
清理 K3D
➜ k3d cluster list
NAME        SERVERS   AGENTS   LOADBALANCER
mycluster   1/1       1/1      true

➜ k3d cluster delete mycluster
INFO[0000] Deleting cluster 'mycluster'
INFO[0000] Deleting cluster network 'k3d-mycluster'
INFO[0000] Deleting 1 attached volumes...
INFO[0000] Removing cluster details from default kubeconfig...
INFO[0000] Removing standalone kubeconfig file (if there is one)...
INFO[0000] Successfully deleted cluster mycluster!

➜ k3d cluster list
NAME   SERVERS   AGENTS   LOADBALANCER

➜ brew uninstall k3d
MicroK8s 结合 Multipass 实践
MicroK8s 是 Ubuntu 公司 Canonical 开发的轻运维、最小化生产级 Kubernetes。
Multipass 是 Ubuntu 公司 Canonical 开发的用于快速创建、管理和操作 Ubuntu 虚拟机的工具。
基础环境
OS: macOS
Architecture: ARM64
Virtualization: Multipass

Installer: Homebrew
安装使用 Multipass
➜ brew install --cask multipass
==> Downloading https://github.com/canonical/multipass/releases/download/v1.12.2/multipass-1.12.2+mac-Darwin.pkg
==> Installing Cask multipass
installer: Package name is multipass
installer: Installing at base path /
installer: The install was successful.
multipass was successfully installed!

➜ multipass list
No instances found.
安装使用 MicroK8s
➜ brew install ubuntu/microk8s/microk8s
==> Tapping ubuntu/microk8s
Cloning into '/opt/homebrew/Library/Taps/ubuntu/homebrew-microk8s'...
==> Fetching ubuntu/microk8s/microk8s
==> Installing microk8s from ubuntu/microk8s
Run `microk8s install` to start with MicroK8s
➜ microk8s install
Launched: microk8s-vm
microk8s (1.28/stable) v1.28.15 from Canonical✓ installed
microk8s-integrator-macos 0.1 from Canonical✓ installed
MicroK8s is up and running. See the available commands with `microk8s --help`.➜ microk8s status --wait-ready
microk8s is running
high-availability: no
datastore master nodes: 127.0.0.1:19001
datastore standby nodes: none
addons:
enabled:
dns # (core) CoreDNS
ha-cluster # (core) Configure high availability on the current node
helm # (core) Helm - the package manager for Kubernetes
helm3 # (core) Helm 3 - the package manager for Kubernetes
disabled:
cert-manager # (core) Cloud native certificate management
cis-hardening # (core) Apply CIS K8s hardening
community # (core) The community addons repository
dashboard # (core) The Kubernetes dashboard
host-access # (core) Allow Pods connecting to Host services smoothly
hostpath-storage # (core) Storage class; allocates storage from host directory
ingress # (core) Ingress controller for external access
kube-ovn # (core) An advanced network fabric for Kubernetes
mayastor # (core) OpenEBS MayaStor
metallb # (core) Loadbalancer for your Kubernetes cluster
metrics-server # (core) K8s Metrics Server for API access to service metrics
minio # (core) MinIO object storage
observability # (core) A lightweight observability stack for logs, traces and metrics
prometheus # (core) Prometheus operator for monitoring and logging
rbac # (core) Role-Based Access Control for authorisation
registry # (core) Private image registry exposed on localhost:32000
rook-ceph # (core) Distributed Ceph storage using Rook
storage # (core) Alias to hostpath-storage add-on, deprecated➜ multipass info microk8s-vm
Name: microk8s-vm
State: Running
Snapshots: 0
IPv4: 192.168.64.6
10.1.254.64
Release: Ubuntu 22.04.5 LTS
Image hash: 7b86a56f8069 (Ubuntu 22.04 LTS)
CPU(s): 2
Load: 0.73 0.40 0.16
Disk usage: 2.9GiB out of 48.4GiB
Memory usage: 624.6MiB out of 3.8GiB
Mounts: --启用 ingress 插件
➜ microk8s enable ingress
Infer repository core for addon ingress
Enabling Ingress
ingressclass.networking.k8s.io/public created
ingressclass.networking.k8s.io/nginx created
namespace/ingress created
serviceaccount/nginx-ingress-microk8s-serviceaccount created
clusterrole.rbac.authorization.k8s.io/nginx-ingress-microk8s-clusterrole created
role.rbac.authorization.k8s.io/nginx-ingress-microk8s-role created
clusterrolebinding.rbac.authorization.k8s.io/nginx-ingress-microk8s created
rolebinding.rbac.authorization.k8s.io/nginx-ingress-microk8s created
configmap/nginx-load-balancer-microk8s-conf created
configmap/nginx-ingress-tcp-microk8s-conf created
configmap/nginx-ingress-udp-microk8s-conf created
daemonset.apps/nginx-ingress-microk8s-controller created
Ingress is enabled
部署测试 Nginx Service
➜ vim nginx-deploy-svc-ingress.yaml
---
apiVersion: apps/v1
kind: Deployment
metadata:
  name: nginx-deploy
spec:
  replicas: 2
  selector:
    matchLabels:
      app: nginx
  template:
    metadata:
      labels:
        app: nginx
    spec:
      containers:
        - name: nginx
          image: nginx
          ports:
            - containerPort: 80
---
apiVersion: v1
kind: Service
metadata:
  name: nginx-svc
spec:
  selector:
    app: nginx
  type: NodePort
  ports:
    - name: http
      port: 80
---
apiVersion: networking.k8s.io/v1
kind: Ingress
metadata:
  name: nginx-ingress
  annotations:
    nginx.ingress.kubernetes.io/rewrite-target: /
spec:
  rules:
    - http:
        paths:
          - path: /
            pathType: Prefix
            backend:
              service:
                name: nginx-svc
                port:
                  number: 80
➜ microk8s kubectl apply -f nginx-deploy-svc-ingress.yaml
deployment.apps/nginx-deploy created
service/nginx-svc created
ingress.networking.k8s.io/nginx-ingress created➜ microk8s kubectl get all
NAME READY STATUS RESTARTS AGE
pod/nginx-deploy-7c5ddbdf54-ld8xc 1/1 Running 0 62s
pod/nginx-deploy-7c5ddbdf54-t44vz 1/1 Running 0 62s
NAME TYPE CLUSTER-IP EXTERNAL-IP PORT(S) AGE
service/kubernetes ClusterIP 10.152.183.1 <none> 443/TCP 22m
service/nginx-svc NodePort 10.152.183.115 <none> 80:30945/TCP 62s
NAME READY UP-TO-DATE AVAILABLE AGE
deployment.apps/nginx-deploy 2/2 2 2 62s
NAME DESIRED CURRENT READY AGE
replicaset.apps/nginx-deploy-7c5ddbdf54 2 2 2 62s➜ microk8s kubectl get ingress
NAME CLASS HOSTS ADDRESS PORTS AGE
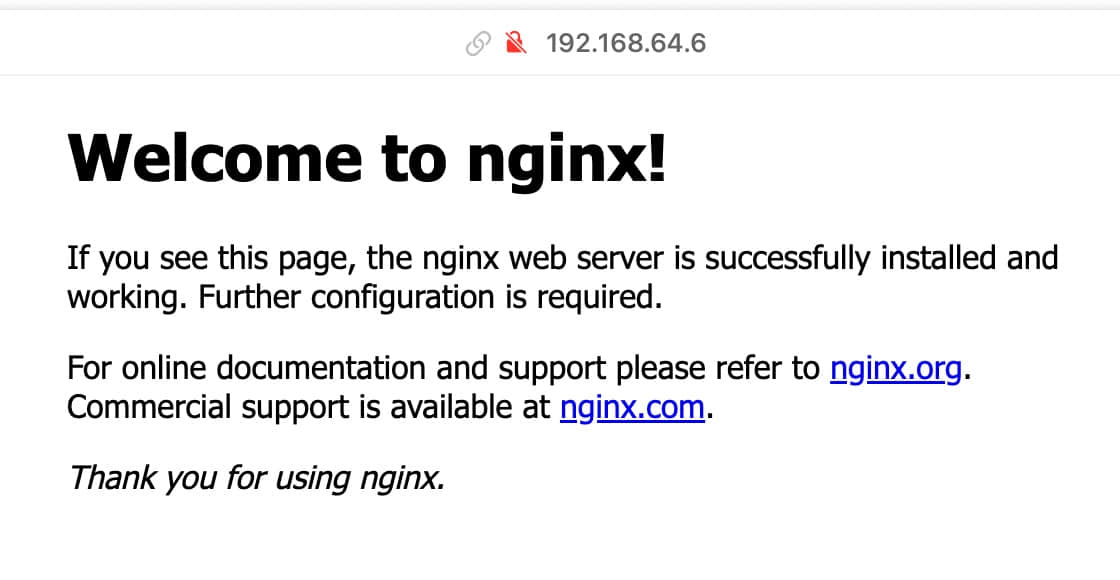
nginx-ingress public * 127.0.0.1 80 2m17s通过 Ingress 访问 Nginx: http://192.168.64.6:80
清理 Multipass 和 MicroK8s
➜ microk8s stop
Stopped.

➜ brew uninstall ubuntu/microk8s/microk8s

➜ brew untap ubuntu/microk8s

➜ rm -rf ~/.microk8s

➜ multipass delete microk8s-vm
➜ multipass purge

➜ multipass list
No instances found.

➜ brew uninstall --cask multipass
K0S 结合 Multipass 实践
K0S 是简单、稳固且经过认证的 Kubernetes 发行版。
Multipass 是 Ubuntu 公司 Canonical 开发的用于快速创建、管理和操作 Ubuntu 虚拟机的工具。
基础环境
OS: macOS
Architecture: ARM64
Virtualization: Multipass

CPUs: 1
Memory: 1Gi
Disk: 10GiB

Installer: Homebrew
安装使用 Multipass
➜ brew install --cask multipass
==> Downloading https://github.com/canonical/multipass/releases/download/v1.16.0/multipass-1.16.0+mac-Darwin.pkg
==> Installing Cask multipass
installer: Package name is multipass
installer: Installing at base path /
installer: The install was successful.
multipass was successfully installed!
➜ multipass launch --name k0s-controller --cpus 1 --mem 1G --disk 10G
Launched: k0s-controller
➜ multipass launch --name k0s-worker --cpus 1 --mem 1G --disk 10G
Launched: k0s-worker➜ multipass info k0s-controller
Name: k0s-controller
State: Running
Snapshots: 0
IPv4: 192.168.64.7
Release: Ubuntu 24.04.2 LTS
Image hash: bbecbb88100e (Ubuntu 24.04 LTS)
CPU(s): 1
Load: 0.04 0.03 0.01
Disk usage: 2.0GiB out of 9.6GiB
Memory usage: 222.6MiB out of 952.9MiB
Mounts: --
➜ multipass info k0s-worker
Name: k0s-worker
State: Running
Snapshots: 0
IPv4: 192.168.64.8
Release: Ubuntu 24.04.2 LTS
Image hash: bbecbb88100e (Ubuntu 24.04 LTS)
CPU(s): 1
Load: 0.04 0.01 0.00
Disk usage: 2.0GiB out of 9.6GiB
Memory usage: 222.4MiB out of 952.9MiB
Mounts: --➜ multipass exec k0s-controller -- bash -c "mkdir -p ~/.ssh && echo '$(cat ~/.ssh/id_rsa.pub)' >> ~/.ssh/authorized_keys"
➜ multipass exec k0s-worker -- bash -c "mkdir -p ~/.ssh && echo '$(cat ~/.ssh/id_rsa.pub)' >> ~/.ssh/authorized_keys"
➜ ssh ubuntu@192.168.64.7
Are you sure you want to continue connecting (yes/no/[fingerprint])? yes
ubuntu@k0s-worker:~$ exit
logout
Connection to 192.168.64.7 closed.
➜ ssh ubuntu@192.168.64.8
Are you sure you want to continue connecting (yes/no/[fingerprint])? yes
ubuntu@k0s-worker:~$ exit
logout
Connection to 192.168.64.8 closed.安装使用 K0S
➜ brew install k0sproject/tap/k0sctl
==> Tapping k0sproject/tap
Cloning into '/opt/homebrew/Library/Taps/k0sproject/homebrew-tap'...
Tapped 2 formulae (17 files, 98KB).
==> Fetching k0sproject/tap/k0sctl
==> Downloading https://github.com/k0sproject/homebrew-tap/releases/download/k0sctl-0.25.1/k0sctl-0.25.1.arm64_sonoma.bottle.tar.gz
==> Installing k0sctl from k0sproject/tap
==> Pouring k0sctl-0.25.1.arm64_sonoma.bottle.tar.gz
/opt/homebrew/Cellar/k0sctl/0.25.1: 9 files, 18.6MB
➜ k0sctl init > k0sctl.yaml➜ vim k0sctl.yaml
apiVersion: k0sctl.k0sproject.io/v1beta1
kind: Cluster
metadata:
name: k0s-cluster
user: admin
spec:
hosts:
- ssh:
address: 192.168.64.7
user: ubuntu
port: 22
keyPath: ~/.ssh/id_rsa
role: controller
- ssh:
address: 192.168.64.8
user: ubuntu
port: 22
keyPath: ~/.ssh/id_rsa
role: worker
options:
wait:
enabled: true
drain:
enabled: true
gracePeriod: 2m0s
timeout: 5m0s
force: true
ignoreDaemonSets: true
deleteEmptyDirData: true
podSelector: ""
skipWaitForDeleteTimeout: 0s
concurrency:
limit: 30
workerDisruptionPercent: 10
uploads: 5
evictTaint:
enabled: false
taint: k0sctl.k0sproject.io/evict=true
effect: NoExecute
controllerWorkers: false➜ k0sctl apply --config k0sctl.yaml
INFO ==> Running phase: Set k0s version
INFO Looking up latest stable k0s version
INFO Using k0s version v1.33.2+k0s.0
INFO ==> Running phase: Connect to hosts
INFO [ssh] 192.168.64.8:22: connected
INFO [ssh] 192.168.64.7:22: connected
INFO ==> Running phase: Detect host operating systems
INFO [ssh] 192.168.64.7:22: is running Ubuntu 24.04.2 LTS
INFO [ssh] 192.168.64.8:22: is running Ubuntu 24.04.2 LTS
INFO ==> Running phase: Acquire exclusive host lock
INFO ==> Running phase: Prepare hosts
INFO ==> Running phase: Gather host facts
INFO [ssh] 192.168.64.7:22: using k0s-controller as hostname
INFO [ssh] 192.168.64.8:22: using k0s-worker as hostname
INFO [ssh] 192.168.64.7:22: discovered enp0s1 as private interface
INFO [ssh] 192.168.64.8:22: discovered enp0s1 as private interface
INFO ==> Running phase: Validate hosts
INFO validating clock skew
INFO ==> Running phase: Validate facts
INFO ==> Running phase: Download k0s on hosts
INFO [ssh] 192.168.64.8:22: downloading k0s v1.33.2+k0s.0
INFO [ssh] 192.168.64.7:22: downloading k0s v1.33.2+k0s.0
INFO ==> Running phase: Install k0s binaries on hosts
INFO [ssh] 192.168.64.7:22: validating configuration
INFO ==> Running phase: Configure k0s
INFO [ssh] 192.168.64.7:22: installing new configuration
INFO ==> Running phase: Initialize the k0s cluster
INFO [ssh] 192.168.64.7:22: installing k0s controller
INFO [ssh] 192.168.64.7:22: waiting for the k0s service to start
INFO [ssh] 192.168.64.7:22: wait for kubernetes to reach ready state
INFO ==> Running phase: Install workers
INFO [ssh] 192.168.64.7:22: generating a join token for worker 1
INFO [ssh] 192.168.64.8:22: validating api connection to https://192.168.64.7:6443 using join token
INFO [ssh] 192.168.64.8:22: writing join token to /etc/k0s/k0stoken
INFO [ssh] 192.168.64.8:22: installing k0s worker
INFO [ssh] 192.168.64.8:22: starting service
INFO [ssh] 192.168.64.8:22: waiting for node to become ready
INFO ==> Running phase: Release exclusive host lock
INFO ==> Running phase: Disconnect from hosts
INFO ==> Finished in 1m18s
INFO k0s cluster version v1.33.2+k0s.0 is now installed
INFO Tip: To access the cluster you can now fetch the admin kubeconfig using:
INFO k0sctl kubeconfig➜ k0sctl kubeconfig > k0s.kubeconfig
➜ kubectl --kubeconfig=k0s.kubeconfig get all --all-namespaces
NAMESPACE NAME READY STATUS RESTARTS AGE
kube-system pod/coredns-5c8cb48c4-rr9k2 1/1 Running 0 8m54s
kube-system pod/konnectivity-agent-sndm9 1/1 Running 0 8m50s
kube-system pod/kube-proxy-csvw7 1/1 Running 0 8m53s
kube-system pod/kube-router-5nn4t 1/1 Running 0 8m53s
kube-system pod/metrics-server-7db8586f5-d7p8h 1/1 Running 0 8m50s
NAMESPACE NAME TYPE CLUSTER-IP EXTERNAL-IP PORT(S) AGE
default service/kubernetes ClusterIP 10.96.0.1 <none> 443/TCP 9m5s
kube-system service/kube-dns ClusterIP 10.96.0.10 <none> 53/UDP,53/TCP,9153/TCP 8m55s
kube-system service/metrics-server ClusterIP 10.98.32.18 <none> 443/TCP 8m50s
NAMESPACE NAME DESIRED CURRENT READY UP-TO-DATE AVAILABLE NODE SELECTOR AGE
kube-system daemonset.apps/konnectivity-agent 1 1 1 1 1 kubernetes.io/os=linux 8m59s
kube-system daemonset.apps/kube-proxy 1 1 1 1 1 kubernetes.io/os=linux 8m55s
kube-system daemonset.apps/kube-router 1 1 1 1 1 <none> 8m56s
NAMESPACE NAME READY UP-TO-DATE AVAILABLE AGE
kube-system deployment.apps/coredns 1/1 1 1 8m56s
kube-system deployment.apps/metrics-server 1/1 1 1 8m50s
NAMESPACE NAME DESIRED CURRENT READY AGE
kube-system replicaset.apps/coredns-5c8cb48c4 1 1 1 8m55s
kube-system replicaset.apps/metrics-server-7db8586f5 1 1 1 8m50s部署测试 Nginx Service
➜ vim nginx-deploy-svc.yaml
---
apiVersion: apps/v1
kind: Deployment
metadata:
  name: nginx-deploy
spec:
  replicas: 2
  selector:
    matchLabels:
      app: nginx
  template:
    metadata:
      labels:
        app: nginx
    spec:
      containers:
        - name: nginx
          image: nginx
          ports:
            - containerPort: 80
---
apiVersion: v1
kind: Service
metadata:
  name: nginx-svc
spec:
  selector:
    app: nginx
  type: NodePort
  ports:
    - name: http
      port: 80
➜ kubectl --kubeconfig=k0s.kubeconfig apply -f nginx-deploy-svc.yaml
deployment.apps/nginx-deploy created
service/nginx-svc created
➜ kubectl --kubeconfig=k0s.kubeconfig get all
NAME READY STATUS RESTARTS AGE
pod/nginx-deploy-86c57bc6b8-pm68d 1/1 Running 0 22s
pod/nginx-deploy-86c57bc6b8-tchhj 1/1 Running 0 22s
NAME TYPE CLUSTER-IP EXTERNAL-IP PORT(S) AGE
service/kubernetes ClusterIP 10.96.0.1 <none> 443/TCP 33m
service/nginx-svc NodePort 10.104.182.55 <none> 80:32110/TCP 22s
NAME READY UP-TO-DATE AVAILABLE AGE
deployment.apps/nginx-deploy 2/2 2 2 22s
NAME DESIRED CURRENT READY AGE
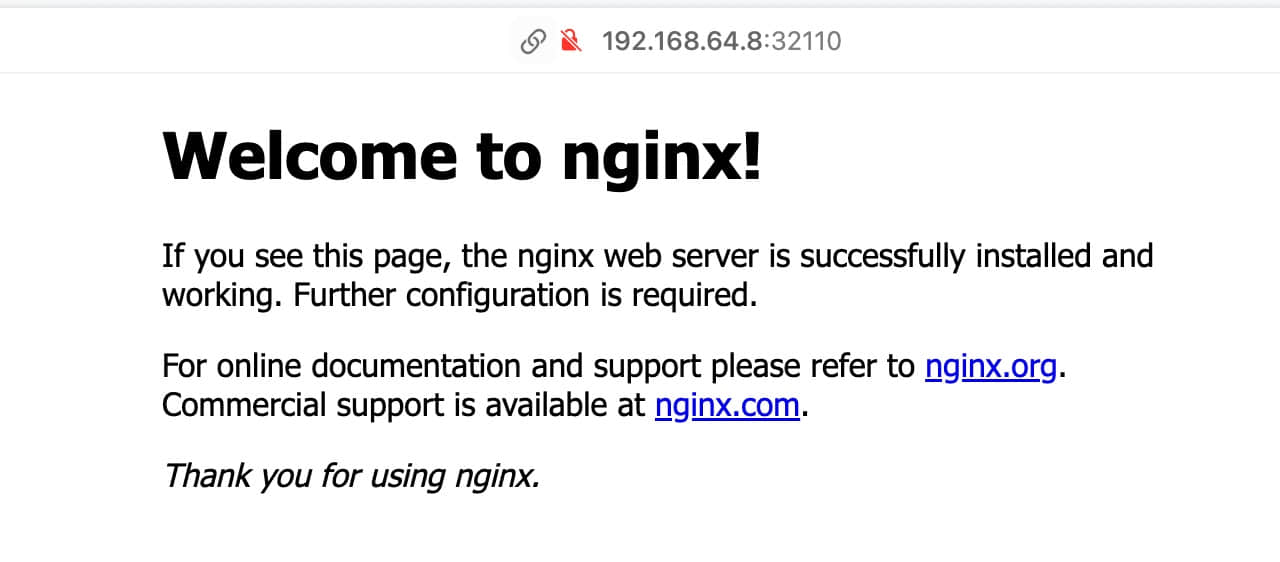
replicaset.apps/nginx-deploy-86c57bc6b8 2 2 2 22s通过 NodePort 访问 Nginx: http://192.168.64.8:32110
清理 Multipass 和 K0S
➜ multipass shell k0s-controller

ubuntu@k0s-controller:~$ sudo k0s status
Version: v1.33.2+k0s.0
Process ID: 2213
Role: controller
Workloads: false
SingleNode: false

ubuntu@k0s-controller:~$ sudo k0s kubectl get nodes
NAME         STATUS   ROLES    AGE   VERSION
k0s-worker   Ready    <none>   40m   v1.33.2+k0s

ubuntu@k0s-controller:~$ sudo k0s stop

ubuntu@k0s-controller:~$ exit
logout
➜ multipass delete k0s-controller k0s-worker
➜ multipass list
Name State IPv4 Image
k0s-controller Deleted -- Ubuntu 24.04 LTS
k0s-worker Deleted -- Ubuntu 24.04 LTS
➜ multipass purge
➜ multipass list
No instances found.➜ brew uninstall --cask multipass
➜ brew uninstall k0sctl
➜ brew untap k0sproject/tapTalos 实践
Talos 是为 Kubernetes 环境设计的安全、最小化且只读的容器化 Linux 操作系统。
基础环境
OS: macOS
Architecture: ARM64
Driver: Docker

Installer: Homebrew
安装使用 Talos
➜ brew install siderolabs/tap/talosctl
==> Tapping siderolabs/tap
Cloning into '/opt/homebrew/Library/Taps/siderolabs/homebrew-tap'...

==> Fetching siderolabs/tap/talosctl
==> Downloading https://github.com/siderolabs/talos/releases/download/v1.10.5/talosctl-darwin-arm64

==> Installing talosctl from siderolabs/tap
/opt/homebrew/Cellar/talosctl/1.10.5: 7 files, 85.6MB, built in 4 seconds
➜ talosctl cluster create
validating CIDR and reserving IPs
generating PKI and tokens
creating state directory in "/Users/damonguo/.talos/clusters/talos-default"
downloading ghcr.io/siderolabs/talos:v1.10.5
creating network talos-default
creating controlplane nodes
creating worker nodes
waiting for API
bootstrapping cluster
waiting for etcd to be healthy: OK
waiting for etcd members to be consistent across nodes: OK
waiting for etcd members to be control plane nodes: OK
waiting for apid to be ready: OK
waiting for all nodes memory sizes: OK
waiting for all nodes disk sizes: OK
waiting for no diagnostics: OK
waiting for kubelet to be healthy: OK
waiting for all nodes to finish boot sequence: OK
waiting for all k8s nodes to report: OK
waiting for all control plane static pods to be running: OK
waiting for all control plane components to be ready: OK
waiting for all k8s nodes to report ready: OK
waiting for kube-proxy to report ready: OK
waiting for coredns to report ready: OK
waiting for all k8s nodes to report schedulable: OK
merging kubeconfig into "/Users/damonguo/.kube/config"
PROVISIONER docker
NAME talos-default
NETWORK NAME talos-default
NETWORK CIDR 10.5.0.0/24
NETWORK GATEWAY 10.5.0.1
NETWORK MTU 1500
KUBERNETES ENDPOINT https://127.0.0.1:60132
NODES:
NAME TYPE IP CPU RAM DISK
/talos-default-controlplane-1 controlplane 10.5.0.2 2.00 2.1 GB -
/talos-default-worker-1 worker 10.5.0.3 2.00 2.1 GB -➜ kubectl get nodes -o wide
NAME STATUS ROLES AGE VERSION INTERNAL-IP EXTERNAL-IP OS-IMAGE KERNEL-VERSION CONTAINER-RUNTIME
talos-default-controlplane-1 Ready control-plane 108s v1.33.2 10.5.0.2 <none> Talos (v1.10.5) 6.14.10-orbstack-00291-g1b252bd3edea containerd://2.0.5
talos-default-worker-1 Ready <none> 102s v1.33.2 10.5.0.3 <none> Talos (v1.10.5) 6.14.10-orbstack-00291-g1b252bd3edea containerd://2.0.5部署测试 Nginx Service
➜ vim nginx-deploy-svc.yaml
---
apiVersion: apps/v1
kind: Deployment
metadata:
  name: nginx-deploy
spec:
  replicas: 2
  selector:
    matchLabels:
      app: nginx
  template:
    metadata:
      labels:
        app: nginx
    spec:
      containers:
        - name: nginx
          image: nginx
          ports:
            - containerPort: 80
---
apiVersion: v1
kind: Service
metadata:
  name: nginx-svc
spec:
  selector:
    app: nginx
  type: NodePort
  ports:
    - name: http
      port: 80
➜ kubectl apply -f nginx-deploy-svc.yaml
Warning: would violate PodSecurity "restricted:latest": allowPrivilegeEscalation != false (container "nginx" must set securityContext.allowPrivilegeEscalation=false), unrestricted capabilities (container "nginx" must set securityContext.capabilities.drop=["ALL"]), runAsNonRoot != true (pod or container "nginx" must set securityContext.runAsNonRoot=true), seccompProfile (pod or container "nginx" must set securityContext.seccompProfile.type to "RuntimeDefault" or "Localhost")
deployment.apps/nginx-deploy created
service/nginx-svc created➜ kubectl get all
NAME READY STATUS RESTARTS AGE
pod/nginx-deploy-86c57bc6b8-dk5fh 1/1 Running 0 33s
pod/nginx-deploy-86c57bc6b8-hb44f 1/1 Running 0 33s
NAME TYPE CLUSTER-IP EXTERNAL-IP PORT(S) AGE
service/kubernetes ClusterIP 10.96.0.1 <none> 443/TCP 8m7s
service/nginx-svc NodePort 10.109.129.119 <none> 80:32659/TCP 33s
NAME READY UP-TO-DATE AVAILABLE AGE
deployment.apps/nginx-deploy 2/2 2 2 33s
NAME DESIRED CURRENT READY AGE
replicaset.apps/nginx-deploy-86c57bc6b8 2 2 2 33s➜ kubectl port-forward svc/nginx-svc 30081:80
Forwarding from 127.0.0.1:30081 -> 80
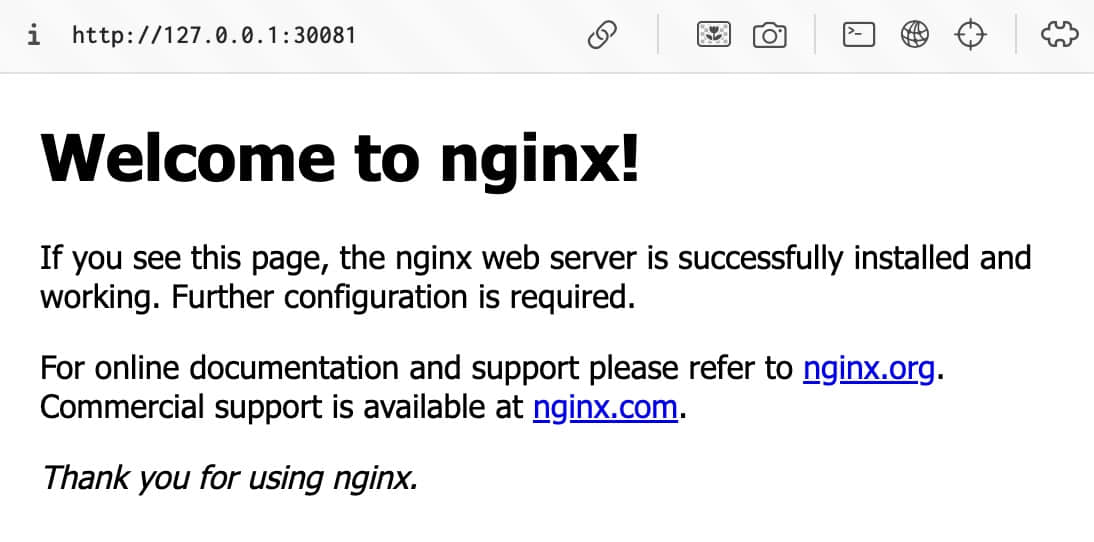
Forwarding from [::1]:30081 -> 80通过 NodePort 本地端口映射访问 Nginx: http://127.0.0.1:30081
清理 Talos
➜ talosctl cluster destroy
destroying node talos-default-controlplane-1
destroying node talos-default-worker-1
destroying network talos-default

➜ talosctl cluster show
PROVISIONER           docker
NAME                  talos-default
NETWORK NAME
NETWORK CIDR
NETWORK GATEWAY
NETWORK MTU           0
KUBERNETES ENDPOINT

NODES:

NAME   TYPE   IP   CPU   RAM   DISK

➜ kubectl config delete-context admin@talos-default
deleted context admin@talos-default from /Users/damonguo/.kube/config
➜ brew uninstall talosctl
➜ brew untap siderolabs/tap总结
针对不同的使用需求,轻量级 Kubernetes 发行版在架构、数据存储、容器运行时、部署依赖、部署难度、插件等方面各具特点,选择时可结合实际场景和技术偏好进行权衡。
| 发行版 | 架构 | 数据存储 | 容器运行时 | 部署依赖 | 部署难度 | 插件 | 适用场景 |
|---|---|---|---|---|---|---|---|
| Minikube | 单节点伪集群 | etcd | Podman / Docker / containerd | Podman / Docker | 简单 | 优 | 本地开发 |
| KinD | 单节点伪集群 | etcd | containerd | Docker | 简单 | 差 | 本地开发、CI/CD |
| K3S | 多节点真集群 | SQLite / etcd /MySQL / PostgreSQL | containerd | Linux | 适中 | 良 | 边缘计算、生产运营 |
| K3D | 单节点伪集群 | SQLite / etcd / MySQL / PostgreSQL | containerd | Docker | 简单 | 良 | 本地开发、CI/CD |
| MicroK8s | 多节点真集群 | etcd / dqlite (distributed SQLite) | containerd / Kata | Linux | 适中 | 优 | 本地开发、生产运营 |
| K0S | 多节点真集群 | etcd / SQLite / MySQL / PostgreSQL | containerd | Linux | 适中 | 中 | 边缘计算、生产运营 |
| Talos | 多节点真集群 | etcd | containerd | Docker | 简单 | 差 | 本地开发、生产运营 |