如何创建自签名 SSL 证书支持私有域名的 HTTPS 服务

在互联网全站 HTTPS 的时代,内部私有域名的 HTTPS 服务部署也尤为重要。
背景
如今,几乎所有的互联网网站和应用都已经是全站 HTTPS 了,但很多企业的内部应用还仍然为了方便而采用 HTTP 的方式在“裸奔”。
在我目前的工作中,内部安全抓的很紧,所有的应用都必须支持 HTTPS 才能部署上线。于是,我在这里将创建自签名 SSL 证书的笔记分享出来,供大家参考。
生成 SSL 证书
1. 生成根证书并导入
首先生成根证书的 Key rootCA.heylinux.com.key,设置加密长度为 4096 以满足安全级别要求。
openssl genrsa -out rootCA.heylinux.com.key 4096
使用根证书的 Key rootCA.heylinux.com.key 生成根证书文件 rootCA.heylinux.com.pem,设置加密方式为 sha256,有效期为 3650天,证书的机构信息为 /C=CN/ST=Sichuan/L=Chengdu/O=HEYLINUX/OU=IT/CN=SRE。
openssl req -x509 -new -nodes -key rootCA.heylinux.com.key -sha256 -days 3650 -out rootCA.heylinux.com.pem -subj "/C=CN/ST=Sichuan/L=Chengdu/O=HEYLINUX/OU=IT/CN=SRE"
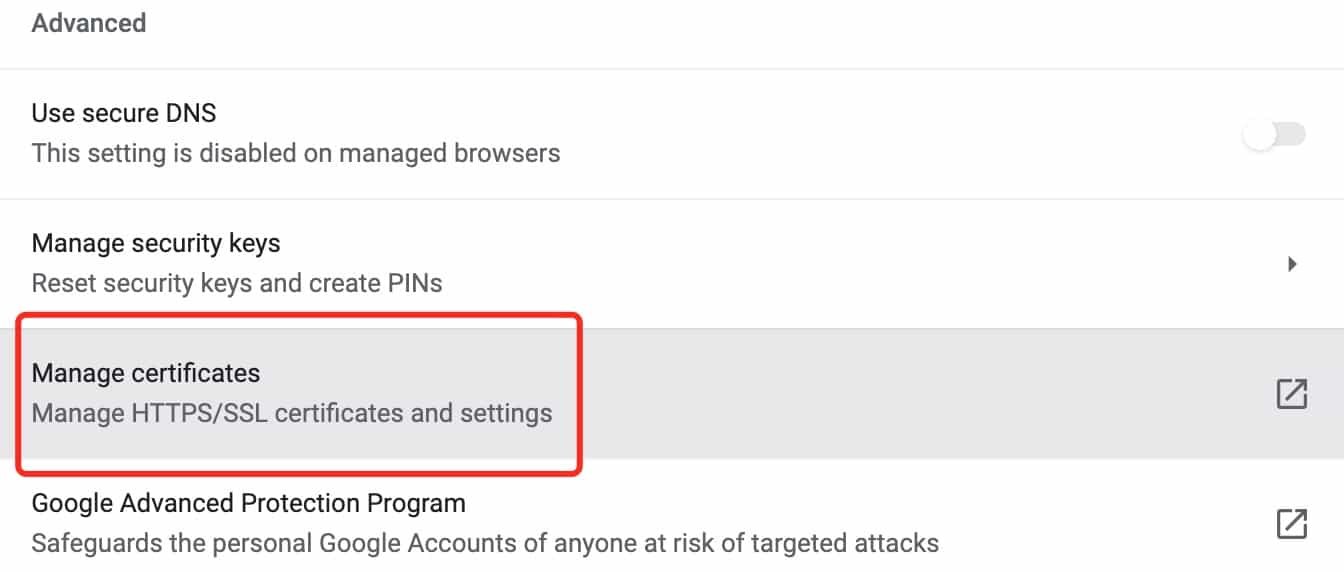
将生成的根证书文件 rootCA.heylinux.com.pem 通过 Chrome 浏览器导入到操作系统中,就可以让浏览器信任之后基于根证书所生成的服务端证书。
2. 生成 SSL 服务端证书
创建服务端证书配置文件 ssl.conf,支持 serverAuth 和 clientAuth,可用于多个泛域名 *.heylinux.com 和 *.cloud.heylinux.com。
vim ssl.conf
subjectAltName = @alt_names
authorityKeyIdentifier = keyid,issuer
keyUsage = digitalSignature,keyEncipherment,nonRepudiation,dataEncipherment
extendedKeyUsage = serverAuth,clientAuth
basicConstraints = CA:FALSE
subjectKeyIdentifier = hash

[alt_names]
DNS.1 = *.heylinux.com
DNS.2 = *.cloud.heylinux.com
生成服务端证书的 Key,文件名 star.heylinux.com.key,机构信息设置为 /C=CN/ST=Sichuan/L=Chengdu/O=HEYLINUX/OU=IT/CN=*.heylinux.com。
openssl req -new -nodes -out star.heylinux.com.csr -newkey rsa:4096 -keyout star.heylinux.com.key -subj "/C=CN/ST=Sichuan/L=Chengdu/O=HEYLINUX/OU=IT/CN=*.heylinux.com"
通过根证书的 Key、根证书、服务端证书的 Key 和服务端证书配置文件 ssl.conf,生成服务端证书,文件名 star.heylinux.com.crt,设置加密方式为 sha256,有效期为 3650天。
openssl x509 -req -in star.heylinux.com.csr -CA rootCA.heylinux.com.pem -CAkey rootCA.heylinux.com.key -CAcreateserial -out star.heylinux.com.crt -days 3650 -sha256 -extfile ssl.conf
查看服务端证书信息。
openssl x509 -text -noout -in star.heylinux.com.crt
Certificate:
    Data:
        Version: 3 (0x2)
        Serial Number:
            10:f8:04:91:06:d8:4a:eb:46:ee:90:80:b4:9c:94:4e:ac:60:7b:3e
        Signature Algorithm: sha256WithRSAEncryption
        Issuer: C = CN, ST = Sichuan, L = Chengdu, O = HEYLINUX, OU = IT, CN = SRE
        Validity
            Not Before: Nov  7 04:38:21 2021 GMT
            Not After : Nov  5 04:38:21 2031 GMT
        Subject: C = CN, ST = Sichuan, L = Chengdu, O = HEYLINUX, OU = IT, CN = *.heylinux.com
        Subject Public Key Info:
            Public Key Algorithm: rsaEncryption
                RSA Public-Key: (4096 bit)
...
                Exponent: 65537 (0x10001)
        X509v3 extensions:
            X509v3 Subject Alternative Name:
                DNS:*.heylinux.com, DNS:*.cloud.heylinux.com
            X509v3 Authority Key Identifier:
                keyid:36:20:25:BA:1A:D9:36:A3:5C:E7:94:30:7F:76:D5:DF:5D:03:99:C9

            X509v3 Key Usage:
                Digital Signature, Non Repudiation, Key Encipherment, Data Encipherment
            X509v3 Extended Key Usage:
                TLS Web Server Authentication, TLS Web Client Authentication
            X509v3 Basic Constraints:
                CA:FALSE
            X509v3 Subject Key Identifier:
                DB:0D:E8:00:A4:3E:95:71:26:1A:0B:57:4C:3C:3B:33:D3:67:F0:16
...
3. 生成不同格式的捆绑证书
捆绑证书通常包含多个服务端证书 Key 和服务端证书。
生成 PKCS12 格式的捆绑证书 star.heylinux.com.p12,设置证书文件的密码为 P_Ss0rdT,文件内别名 heylinux_com,这种证书可用于服务器软件如 Tomcat。
openssl pkcs12 -export -in star.heylinux.com.crt -inkey star.heylinux.com.key -password pass:P_Ss0rdT -name heylinux_com -out star.heylinux.com.p12
将生成好的 PKCS12 格式的捆绑证书 star.heylinux.com.p12 转换为 JKS 格式 star.heylinux.com.jks,设置证书文件的密码为 P_Ss0rdT,文件内别名 heylinux_com,这种证书可用于 Java 类应用的服务器软件如 Tomcat。
keytool -importkeystore -deststorepass P_Ss0rdT -destkeystore star.heylinux.com.jks -srcstorepass P_Ss0rdT -srckeystore star.heylinux.com.p12 -srcstoretype PKCS12
将生成好的 PKCS12 格式的捆绑证书 star.heylinux.com.p12 转换为 PEM 格式 star.heylinux.com.pem,文件内别名 heylinux_com,不设置证书文件的密码,这种证书可用于服务器软件如 Apache、Nginx、HAProxy 和 AWS ELB。
openssl pkcs12 -password pass:P_Ss0rdT -in star.heylinux.com.p12 -out star.heylinux.com.pem -nodes
4. 将根证书转换为 JKS 格式
将根证书 rootCA.heylinux.com.pem 转换为 JKS 格式 rootCA.heylinux.com.jks,文件内别名 heylinux_com,用于 Java 类应用对服务端证书进行校验,原理类似于上面“导入到操作系统中,就可以让浏览器信任之后基于根证书所生成的服务端证书”。
# 先生成 rootCA.heylinux.com.der
openssl x509 -in rootCA.heylinux.com.pem -out rootCA.heylinux.com.der -outform der

# 查看 rootCA.heylinux.com.der
keytool -v -printcert -file rootCA.heylinux.com.der

# 再将 rootCA.heylinux.com.der 转换为 rootCA.heylinux.com.jks
keytool -importcert -alias heylinux_com -keystore rootCA.heylinux.com.jks -storepass P_Ss0rdT -file rootCA.heylinux.com.der

# 查看 rootCA.heylinux.com.jks
keytool -keystore rootCA.heylinux.com.jks -storepass P_Ss0rdT -list
转换和查看 SSL 证书
1. 从 P7B 到 PEM
将 Windows 生成的根证书 SubCA_2.p7b 从 P7B 格式转换为 PEM 格式 rootCA.heylinux.com.pem。
openssl pkcs7 -inform DER -print_certs -in SubCA_2.p7b -out rootCA.heylinux.com.pem
2. 从 PEM 到 JKS
将 PEM 格式的根证书 rootCA.heylinux.com.pem 转换为 JKS 格式 rootCA.heylinux.com.jks。
# 生成 rootCA.heylinux.com.der
openssl x509 -in rootCA.heylinux.com.pem -out rootCA.heylinux.com.der -outform der

# 生成 rootCA.heylinux.com.jks, 文件内别名 heylinux_com
keytool -importcert -alias heylinux_com -keystore rootCA.heylinux.com.jks -storepass P_Ss0rdT -file rootCA.heylinux.com.der
3. 从 PFX(P12) 到 PEM
将 PFX(P12) 格式的证书 star.heylinux.com.pfx 转换为 PEM 格式 star.heylinux.com.pem,通常 star.heylinux.com.pem 包含了服务端证书 Key 和服务端证书,可以手动将其中的内容分别复制出来,生成服务端证书 Key star.heylinux.com.key 和服务端证书 star.heylinux.com.crt。
openssl pkcs12 -password pass:P_Ss0rdT -nodes -in star.heylinux.com.pfx -out star.heylinux.com.pem
4. 从 P12 到 JKS
将 P12 格式的证书 star.heylinux.com.p12 转换为 JKS 格式 star.heylinux.com.jks,文件内别名 heylinux_com。
keytool -importkeystore -deststorepass P_Ss0rdT -destkeystore star.heylinux.com.jks -srcstorepass P_Ss0rdT -srckeystore star.heylinux.com.p12 -srcstoretype PKCS12 -alias heylinux_com
5. 查看各种格式的证书
# 查看 PEM 格式的证书 rootCA.heylinux.com.pem 和 star.heylinux.com.pem
openssl x509 -noout -text -in rootCA.heylinux.com.pem
openssl x509 -noout -text -in star.heylinux.com.pem

# 查看 P12 格式的证书 star.heylinux.com.p12
keytool -list -v -keystore star.heylinux.com.p12 -storepass P_Ss0rdT -storetype PKCS12

# 查看 JKS 格式的证书 star.heylinux.com.jks
keytool -list -v -keystore star.heylinux.com.jks -storepass P_Ss0rdT
无需根证书的 TLS/SSL 证书
对于一些应用如 NiFi、vsFTPd,主要将 TLS/SSL 证书直接用于客户端与服务端校验,类似于 SSH 的私钥与公钥间的认证关系,这类 TLS/SSL 证书可以不需要根证书。
创建服务端证书配置文件 tls.conf,证书的机构信息为 /C=CN/ST=Sichuan/L=Chengdu/O=HEYLINUX/OU=IT/CN=SRE,可用于多个 IP 10.8.5.7 和 10.2.3.4,和多个泛域名 *.heylinux.com 和 *.cloud.heylinux.com。
vim tls.conf
[req]
prompt = no
req_extensions = req_ext
distinguished_name = dn

[dn]
 C = CN
ST = Sichuan
 L = Chengdu
 O = HEYLINUX
OU = IT
CN = SRE

[req_ext]
subjectAltName = @alt_names

[alt_names]
IP.1 = 10.8.5.7
IP.2 = 10.2.3.4
DNS.1 = *.heylinux.com
DNS.2 = *.cloud.heylinux.com
可通过以下方式生成,设置加密方式为 sha256,有效期为 3650天,证书文件密码为 P_Ss0rdT。
# 生成证书 Key heylinux-ssl-keypair.key 和证书 heylinux-ssl-keypair.crt
openssl req -x509 -newkey rsa:4096 -keyout heylinux-ssl-keypair.key -out heylinux-ssl-keypair.crt -days 3650 -sha256 -extensions req_ext -config tls.conf

# 输入密码
Generating a RSA private key
....................................+++++
writing new private key to 'heylinux-ssl-keypair.key'
Enter PEM pass phrase: P_Ss0rdT
Verifying - Enter PEM pass phrase: P_Ss0rdT

# 将证书 Key 和证书转换为 P12 格式的捆绑证书 heylinux-ssl-keypair.p12
openssl pkcs12 -export -in heylinux-ssl-keypair.crt -inkey heylinux-ssl-keypair.key -password pass:P_Ss0rdT -name heylinux_ssl_keypair -out heylinux-ssl-keypair.p12

# 输入密码
Enter pass phrase for heylinux-ssl-keypair.key: P_Ss0rdT

# 查看 P12 格式的捆绑证书 heylinux-ssl-keypair.p12
keytool -list -v -keystore heylinux-ssl-keypair.p12 -storepass P_Ss0rdT -storetype PKCS12
使用 cfssl 生成和查看 SSL 证书
1. 安装命令行工具
下载命令行工具 cfssl,cfssljson 和 cfssl-certinfo 并给予执行权限。
sudo wget https://pkg.cfssl.org/R1.2/cfssl_linux-amd64 -O /usr/local/bin/cfssl
sudo wget https://pkg.cfssl.org/R1.2/cfssljson_linux-amd64 -O /usr/local/bin/cfssljson
sudo wget https://pkg.cfssl.org/R1.2/cfssl-certinfo_linux-amd64 -O /usr/local/bin/cfssl-certinfo
sudo chmod +x /usr/local/bin/cfssl*
2. 生成和查看根证书
创建 json 配置文件 rootCA.json,生成与上面配置相同的 rootCA.heylinux.com.key(cfssl 不支持证书 key 与证书长度不一致,因此加密长度仅为2048)和 rootCA.heylinux.com.pem。
{
    "CA": {
        "expiry": "87600h",
        "pathlen": 0
    },
    "CN": "SRE",
    "key": {
        "algo": "rsa",
        "size": 2048
    },
    "names": [
        {
            "C": "CN",
            "ST": "Sichuan",
            "L": "Chengdu",
            "O": "HEYLINUX",
            "OU": "IT"
        }
    ]
}
cfssl gencert -initca rootCA.json | cfssljson -bare rootCA.heylinux.com
2021/11/13 05:11:48 [INFO] generating a new CA key and certificate from CSR
2021/11/13 05:11:48 [INFO] generate received request
2021/11/13 05:11:48 [INFO] received CSR
2021/11/13 05:11:48 [INFO] generating key: rsa-2048
2021/11/13 05:11:48 [INFO] encoded CSR
2021/11/13 05:11:48 [INFO] signed certificate with serial number 644632230923530854661361284854682897812867573233
ls -1
rootCA.heylinux.com.csr
rootCA.heylinux.com-key.pem
rootCA.heylinux.com.pem
rootCA.json
mv rootCA.heylinux.com-key.pem rootCA.heylinux.com.key
查看根证书 rootCA.heylinux.com.pem 信息。
cfssl-certinfo -cert rootCA.heylinux.com.pem
{
  "subject": {
    "common_name": "SRE",
    "country": "CN",
    "organization": "HEYLINUX",
    "organizational_unit": "IT",
    "locality": "Chengdu",
    "province": "Sichuan",
    "names": [
      "CN",
      "Sichuan",
      "Chengdu",
      "HEYLINUX",
      "IT",
      "SRE"
    ]
  },
  "issuer": {
    "common_name": "SRE",
    "country": "CN",
    "organization": "HEYLINUX",
    "organizational_unit": "IT",
    "locality": "Chengdu",
    "province": "Sichuan",
    "names": [
      "CN",
      "Sichuan",
      "Chengdu",
      "HEYLINUX",
      "IT",
      "SRE"
    ]
  },
  "serial_number": "644632230923530854661361284854682897812867573233",
  "not_before": "2021-11-12T20:53:00Z",
  "not_after": "2031-11-10T20:53:00Z",
  "sigalg": "SHA256WithRSA",
  "authority_key_id": "36:D1:86:6B:27:AE:24:EF:C7:B3:2B:25:E7:92:DE:F1:0:34:2B:E5",
  "subject_key_id": "36:D1:86:6B:27:AE:24:EF:C7:B3:2B:25:E7:92:DE:F1:0:34:2B:E5",
  "pem": "-----BEGIN CERTIFICATE-----...-----END CERTIFICATE-----\n"
}
3. 生成和查看 SSL 服务端证书
创建 json 配置文件 ssl-config.json 和 ssl.json,生成与上面配置相同的 star.heylinux.com.key(cfssl 不支持证书 key 与证书长度不一致,因此加密长度仅为2048)和 star.heylinux.com.crt。
vim ssl-config.json
{
  "signing": {
    "default": {
      "expiry": "87600h"
    },
    "profiles": {
      "server": {
        "usages": [
          "signing",
          "key encipherment",
          "server auth",
          "client auth"
        ],
        "expiry": "87600h"
      }
    }
  }
}
vim ssl.json
{
  "CN": "*.heylinux.com",
  "hosts": [
    "*.heylinux.com",
    "*.cloud.heylinux.com"
  ],
  "key": {
    "algo": "rsa",
    "size": 2048
  },
  "names": [{
    "C": "CN",
    "ST": "Sichuan",
    "L": "Chengdu",
    "O": "HEYLINUX",
    "OU": "IT"
  }]
}
cfssl gencert -ca=rootCA.heylinux.com.pem -ca-key=rootCA.heylinux.com.key -config=ssl-config.json -profile=server ssl.json | cfssljson -bare star.heylinux.com

mv star.heylinux.com.pem star.heylinux.com.crt
mv star.heylinux.com-key.pem star.heylinux.com.key

ls -1
rootCA.heylinux.com.csr
rootCA.heylinux.com.key
rootCA.heylinux.com.pem
rootCA.json
ssl-config.json
ssl.json
star.heylinux.com.crt
star.heylinux.com.csr
star.heylinux.com.key
查看服务端证书 star.heylinux.com.crt 信息。
cfssl-certinfo -cert star.heylinux.com.crt
{
  "subject": {
    "common_name": "*.heylinux.com",
    "country": "CN",
    "organization": "HEYLINUX",
    "organizational_unit": "IT",
    "locality": "Chengdu",
    "province": "Sichuan",
    "names": [
      "CN",
      "Sichuan",
      "Chengdu",
      "HEYLINUX",
      "IT",
      "*.heylinux.com"
    ]
  },
  "issuer": {
    "common_name": "SRE",
    "country": "CN",
    "organization": "HEYLINUX",
    "organizational_unit": "IT",
    "locality": "Chengdu",
    "province": "Sichuan",
    "names": [
      "CN",
      "Sichuan",
      "Chengdu",
      "HEYLINUX",
      "IT",
      "SRE"
    ]
  },
  "serial_number": "608638693485247133136510097809090433439285866629",
  "sans": [
    "*.heylinux.com",
    "*.cloud.heylinux.com"
  ],
  "not_before": "2021-11-12T21:20:00Z",
  "not_after": "2031-11-10T21:20:00Z",
  "sigalg": "SHA256WithRSA",
  "authority_key_id": "2B:D4:44:57:4D:9:D8:9A:0:63:4C:5B:B8:78:F4:8F:45:9C:3C:F5",
  "subject_key_id": "4E:15:55:4A:34:EA:BA:69:3E:A5:F:40:74:16:52:F0:88:C3:7D:6F",
  "pem": "-----BEGIN CERTIFICATE-----...-----END CERTIFICATE-----\n"
}